Turning My Old Printer into a Wireless Printer with a Raspberry Pi
Every few weeks my dad would remind me that I need to print a physical piece of paper for “keeping records”. And like the weeks before I would keep forgetting to do so until one day I get another reminder saying that its been almost a month since the last reminder. Oh Well!
So here is the Scenario :
- Connect my old but trusty HP LaserJet 1020 to the home WiFi network (Using a Raspberry Pi)
- Make it easy (and reliable) enough for my (not so tech-savvy) parents to print from their phones
- Never be asked to print anything ever again :)
Here’s the Setup I used:
- Hook up the printer to a Raspberry Pi (Literally any Pi works here, I am using a “Headless” Raspberry Pi 3B because I have it handy)
- Connect the Raspberry Pi to your network (I am using WiFi .. I guess thats the point of this guide 😛)
- Use CUPS to start sharing the printer using IPP — Internet Printing Protocol
- Install/Setup CUPS support on Android and Windows Clients
Quick Note : A lot of guides suggest you need to setup SAMBA to share printer on Windows. This is NOT required and I would rather suggest against it (see below)
But wait … Why Not:
- Connect it to a computer .. use Google Cloud Print .. yada yada ? Because it still needs a computer to be booted up and running for when someone wants a print out. My Raspberry Pi is already Pi-Hole and is a lot more energy efficient
- Buy a new WiFi Printer ? Because even after being a printer from mid 2000s, trusty LaserJet 1020 is fast, virtually maintenance free and its “compatible” toner cartridges sell for as low as ₹400 (~ US$ 5)
Installing Stuff on the Raspberry Pi
(I am assuming you know your way around SSH and are running Raspberry Pi OS/Raspbian. If you are new to Raspberry Pi, this guide can help you get started with a headless Raspberry Pi Setup)
All we need to make this setup to work is CUPS (Common Unix Printing System) which is the thing that makes Linux computers spit out paper.
Installing CUPS is rather straight forward on Rasbian/RPi OS.
Here are the steps:
0. Connecting Raspberry Pi (over WiFi) to your Network
Like with everything on the Pi there are multiple ways to connect the Pi to your network (using WiFi)
- If you have a keyboard/mouse/monitor connected : Use Raspi-Config to connect to WiFi
- If you just burnt your OS image to the card : Setup WiFi & SSH Without a Monitor
- Having a wired/wireless network connection with a static IP address will make your life easy — checkout this guide
I prefer to keep the Raspberry Pi’s network configuration set to DHCP and assign a static lease on the router. In my opinion, this makes it easier to make changes to my network setup without remembering to reconfigure the Pi.
In my setup, even with almost 3 walls between my Pi and WiFi router, the signal strength is pretty good.
1. Update the Raspberry Pi
sudo apt-get update
sudo apt-get upgrade
2. Lets Install CUPS server
sudo apt-get install cups
CUPS has an accompanying web console (localhost:631) which is used for various admin tasks like adding new printers. This web console require the root user to log in in order to configure options.
Adding any user to the lpadmin group gives that user access to the administrative options of the web console.
I’ve added the pi user to the lpadmin user group using :
sudo usermod -a -G lpadmin pi
By default CUPS is only accessible on the Pi itself. It make it available remotely, lets change the access rules :
sudo cupsctl --remote-any
Next, restart the CUPS server using sudo systemctl restart cups
(This makes the server available to all IPs which is not secure — see footnote about changing to just your LAN subnet)
The CUPS server should now be accessible on the Raspberry Pi’s IP — example: http://192.168.5.3
(Tip: to quickly find the IP of the Pi — Run hostname -I)
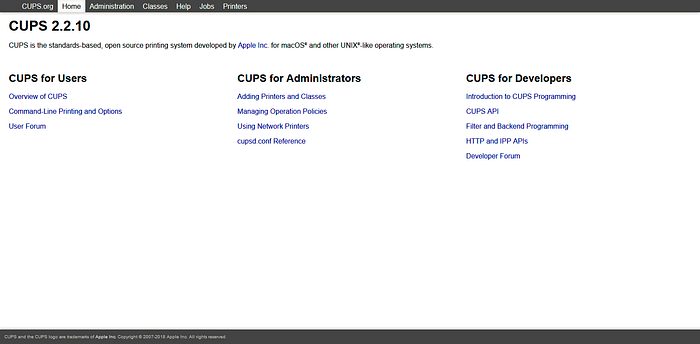
You should be greeted with a page like this:
3. Adding a Printer to CUPS Server
Plug in your printer to any USB port of the Raspberry Pi and power it on.
Navigate to the CUPS console and follow these steps
- https://(Your-Pi-IP):631
- Administration → Printers → Add Printers
- Should give you the prompt to login — you use your user credentials to continue
You should be able to see the printer you have connected
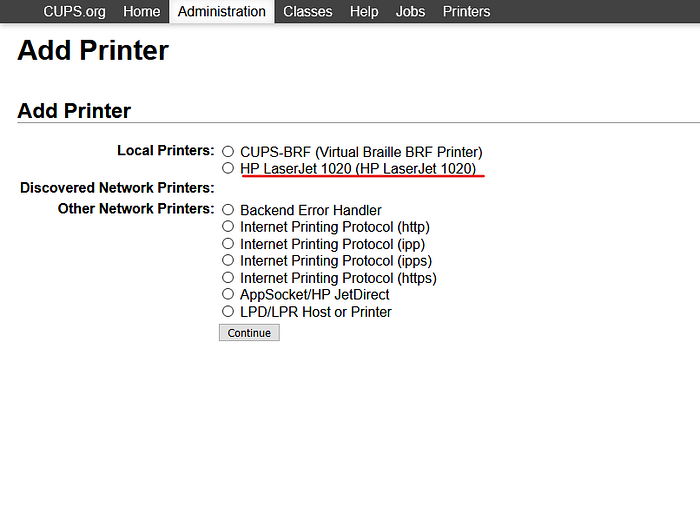
- Select the printer from list and click continue
If you are able to see your printer in the “Local Printers” list : check if the printer is turned on and is connected with a good USB cable. My printer wasn’t showing up in the list and so changing the USB cable fixed this issue for me (See Below)
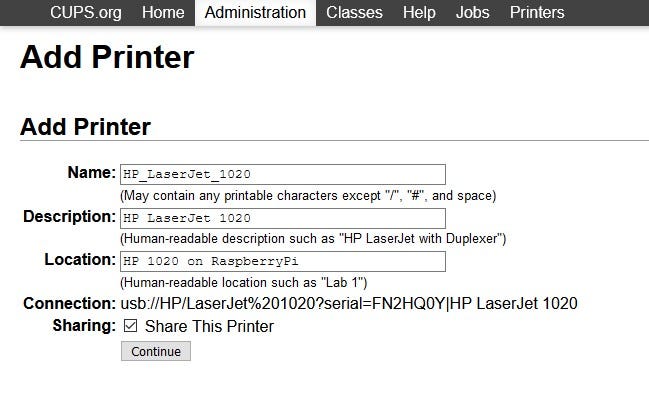
- On the next screen you would be able to set some identification for the printer you are adding. Ensure that your enable “Share this Printer” option at this screen and click continue
- CUPS will show a list of models and drivers for your printer model.
(Here is where you might need to search the interwebs for which drivers work best for your model) (If you are trying to setup HP LaserJet 1020 or a Host-Based Printer see below)
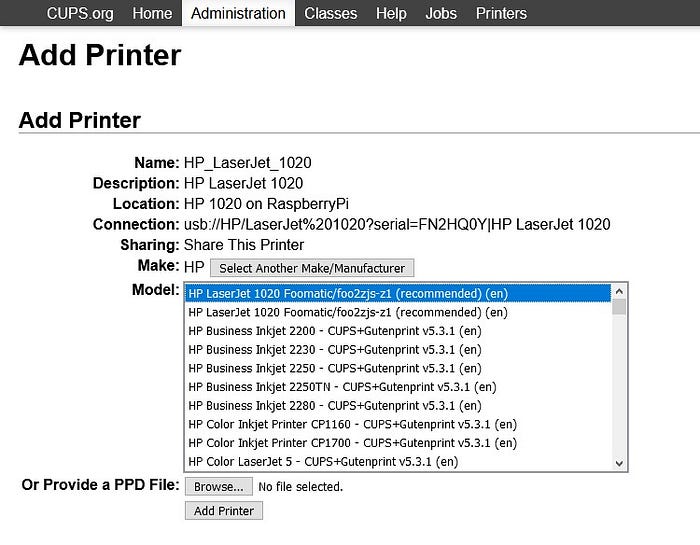
- On the final screen you would be presented with some options to set default options for the printer.
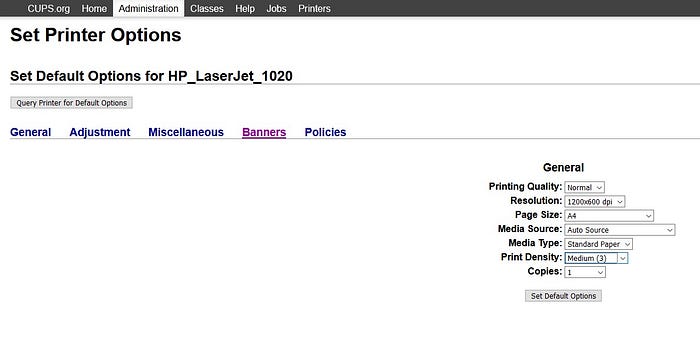
- This pretty much wraps it up for your CUPS setup. Go ahead and try a test print!
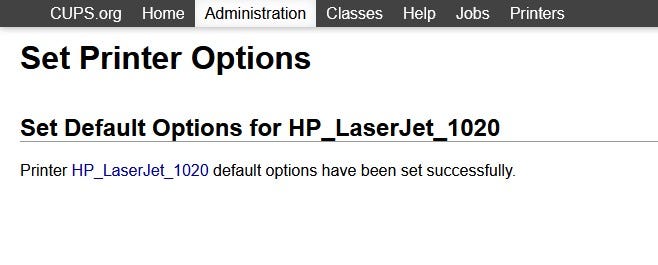
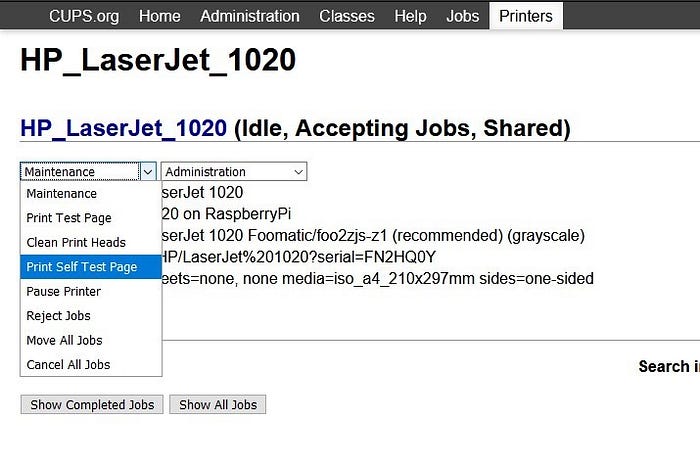
- Lets Try a Test Print :D

And FINALLY :D
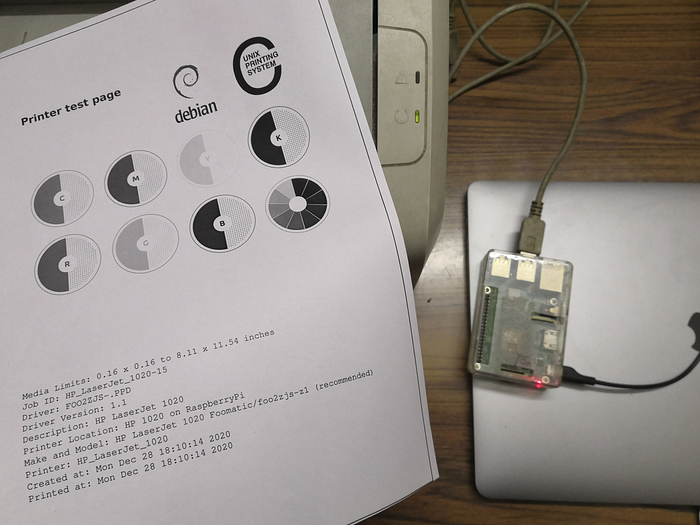
Well in reality this wasn’t as smooth of a ride as it sounds here as you will read below but it does call for a celebration
3.1 Steps Specific to HP LaserJet 1020
If like me you are trying to connect your HP LaserJet 1020 to the Raspberry Pi, you might be disheartened that CUPS does not show it up in the list of available drivers. Here’s where Foo2zjs comes to rescue.
Update Mar 2023 — The original Foo2zjs project page seems to have disappeared and there are several mirrors available : mirror by linkevich, mirror on github
As mentioned on the project page, HP LaserJet 1020 uses the ZjStream printers and to add the support to CUPS we need to add those drivers to our Raspberry Pi.
Installing Foo2zjs Drivers on Raspberry Pi
If you head to the Foo2zjs project page, you would be greeted with the following message :
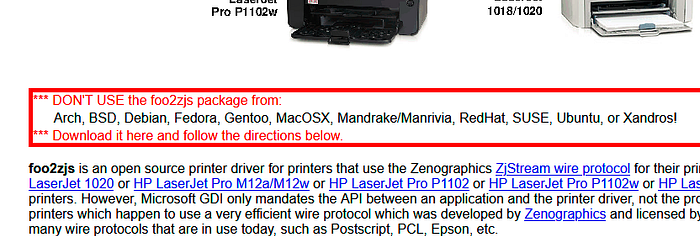
So I followed the instructions as mentioned by the author in the download and install section :
Download the Foo2zjs Source
cd ~
wget -O foo2zjs.tar.gz http://foo2zjs.rkkda.com/foo2zjs.tar.gz
(See update above for new download link for the tar ball)
Extracting the Source
tar zxf foo2zjs.tar.gzcd foo2zjs
Compiling The Source (Don’t worry this doesn't take too long. It took about ~8 mins)
make./getweb 1020 #Get HP LaserJet 1020 firmware filesudo make installsudo make install-hotplugsudo make cups
This wraps up the things at the foo2zjs part. Now head back to the “Add Printer” section in CUPS and the shiny new driver for HP LaserJet 1020 should show up :
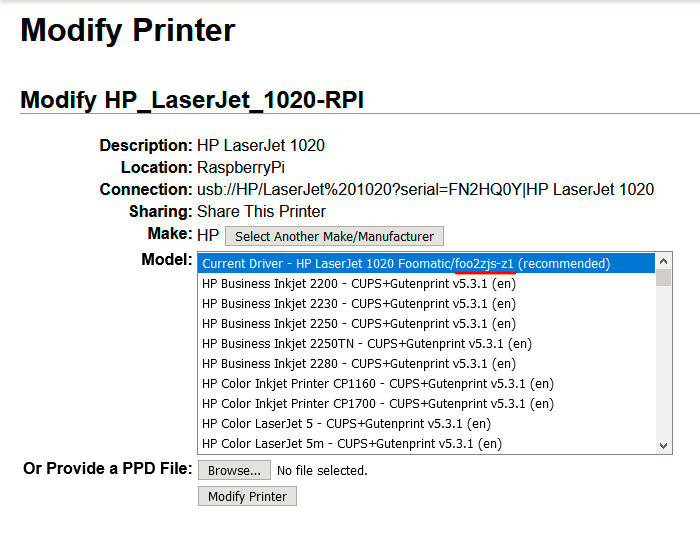
Woohoo! Your 10+ years old printer is now connected to your WiFi network.
Add CUPS support to an Android Phone
While setting some “Printing” options varies slightly for every flavor/skin of Android, the basic steps are the same:
Install CUPS (IPP) Support:
I found the easiest way to achieve this was using an open-source app by UpActivity called CUPS Printing on:
Google Play: https://play.google.com/store/apps/details?id=io.github.benoitduffez.cupsprint
F-Droid : https://f-droid.org/packages/io.github.benoitduffez.cupsprint/
Add a Printer to your Phone
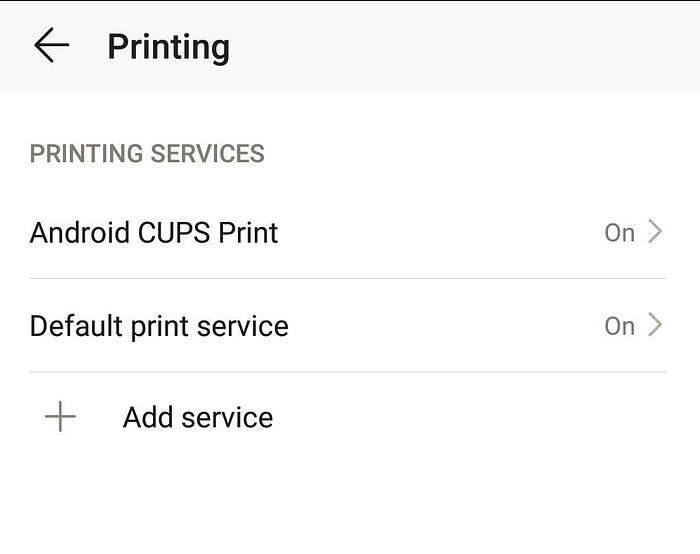
Under “Settings → Printing” you should now see Android CUPS Print.
Heres how it looks on my phone:
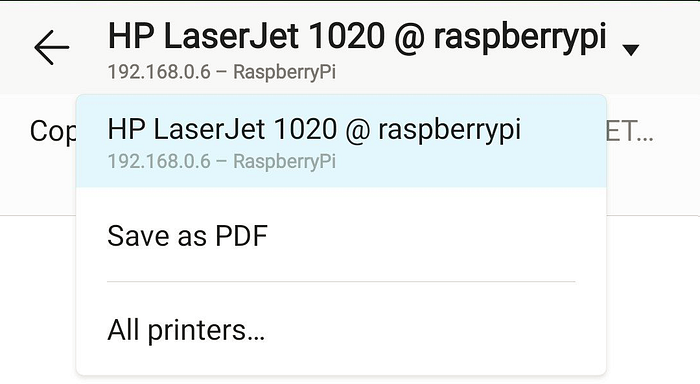
When I try to the “Export/Print” option on my phone, I see the LaserJet 1020 with the name and description set on CUPS
Add CUPS Printer to Windows 10 Client
You don’t need SAMBA!
If you search for guides about using Raspberry Pi as printer server, most of them recommend using SAMBA to share the printer.
While SMB can used for sharing printer, IPP does not require it as many guides suggest. Also setting SAMBA and getting Windows PC to show the Raspberry Pi in the damn network work neighborhood is a nightmare.
While windows did see the printer at times, it failed to install the drivers so matter how I tried to configure the SAMBA server. So unless you are planning to share files with Pi over SMB, I would recommend simply adding the printer using IPP.
Adding CUPS printer to Windows 10 client using IPP
Internet Printing Protocol support is enabled on Windows 10 by default but it’s never a bad idea to check :
- Go to Control Panel → Turn On Windows Features
(You can just press windows key and search for this) - In the list of features, scroll down to Print and Document Services and verify that the Internet Printing Client checkbox is checked
Add A New Printer
Under “Printers & Scanner”- Click Add Printers & Scanner. Click on the “The Printer that I want isn’t listed” option
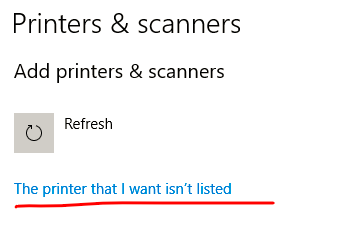
On the next screen, copy/paste the CUPS printer URL to the “Select a Shared Printer By Name” textfield. Do ensure that you copy the HTTP URL and not the HTTPS one

If the connection is successful, on the next screen you will be presented with a list of drivers to choose from. Find and choose the appropriate driver from the list or download the driver files from the manufacturer’s website.
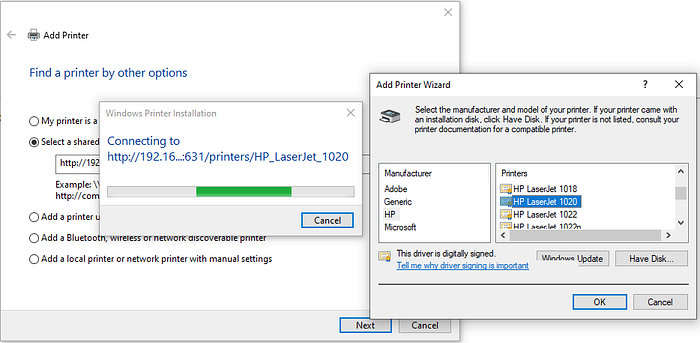
Thats it! Go ahead try a test print
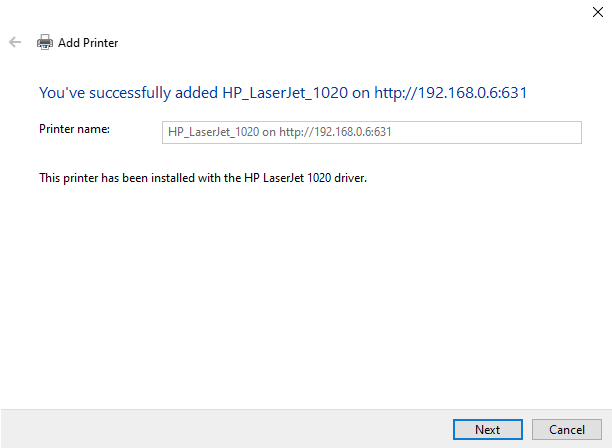
Some Other Issues I faced
I had to try 3 different cables (and change the power adapter)
For Raspberry Pi to finally recognize the printer I had to try 3 different cables (including a brand new one which Pi fails to read from). All of these cables seem to work on my PC and Laptop but frustratingly enough one of the cables worked well for 2+ days and as soon as I started writing this post the cable simply stopped working.
Here how you can diagnose this :
- See if Raspberry Pi can read your printer
lsusb - If the Pi can see the printer it will show up in the list:

In my case whenever I would use a faulty cable I would see:
usb 1–1.5: device descriptor read/64, error -71
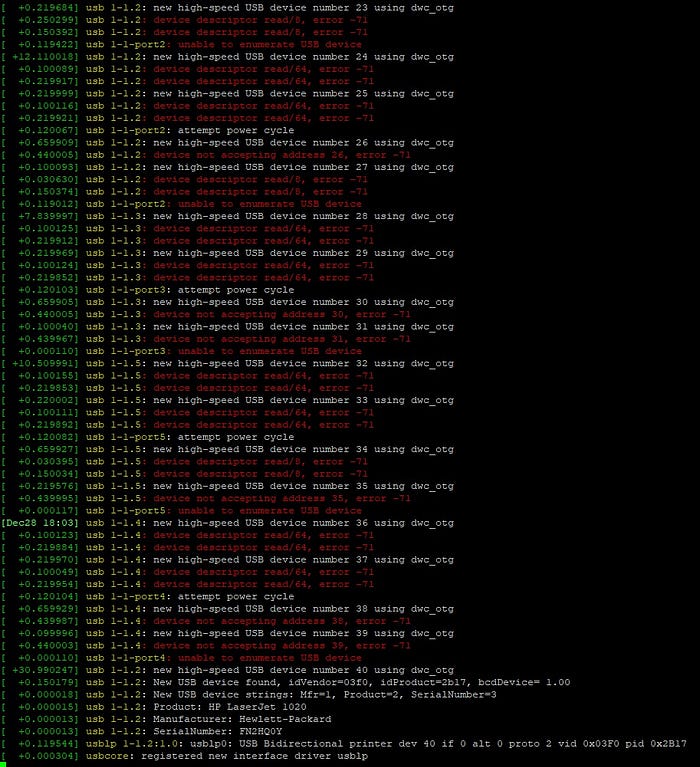
I could not a definitive reference for “error -71” but as per this post it has to do with over-current protection on USB
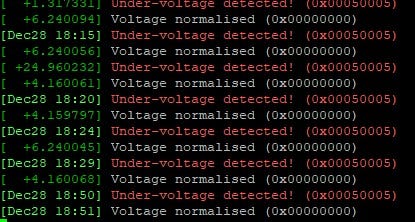
I also had to change my Power USB cable and Power Supply as it did not deliver the right voltage
I hope this helps in getting started with your own printer server setup. If you have any question, do ping me Twitter: https://twitter.com/_Tripad
Until Next Time

